The weather has been wonderful this past week. Warm and balmy, like spring. So nice. I hate to see it end, but it will. Tomorrow brings the cold, the sleet, the snow.
I have been taking advantage of this nice weather and transplanted many things.
 I dug up a dozen Forsythia from a spot on the wooded hillside and planted many of them along the south edge of the property. We have a lane there that goes all the way to the bottom of the property. It is a nice lane, but I thought I would spruce it up with the Forsythia. They will also give some nice spring color and provide a bit more privacy for neighbors. It was a bit of a challenge to digging these up on the hillside. It is a bit steep and there is a lot of saplings to work around also. I fought falling down the hill more than a few times.
The new location will give them much more visibility and also much more sunlight. There are still a dozen or so left on the hillside. I am going to keep one or two of them there and move the rest of them to various parts of the property. I have another patch of Forsythia that also needs dug up and moved. It is right against the north side of the barn, right under a door. It is a tight grouping of many. They do not bloom well in this location, needing much more space and sunlight.
One of my favorite trees is the Eastern Red Bud. We are lucky to have a uncountable amount of them, of all sizes. They are mostly on the north end of the house, mostly lining the hillside and the state park property line.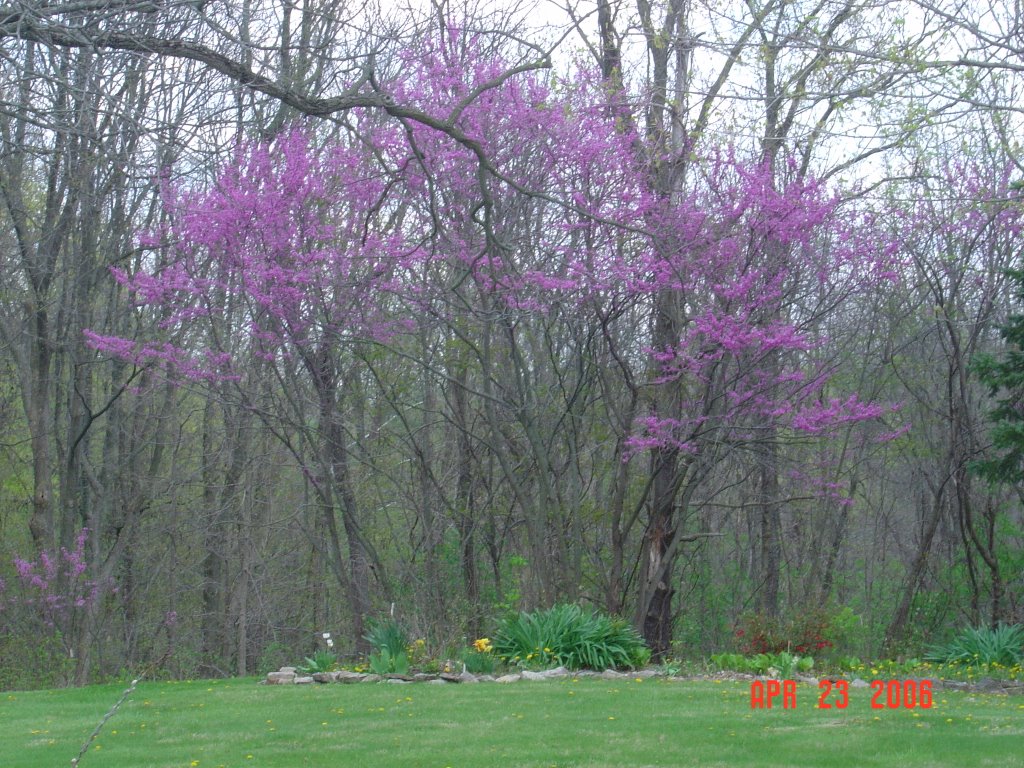 There are also hundreds more seedlings no taller than a foot everywhere. Red Buds do transplant well, but only if you move them when they are less than 3 foot tall. As a smaller tree when dug up, I usually bare root them (even in the middle of summer) and so far have had good success.
These taller ones are visible from the bedroom windows and also from the street. I absolutely love the color.
I transplanted one to the new Forsythia bed alongside the lane. It will contrast nicely with the yellow. I transplanted four more to the west side of the house in a newer bed that I have been working on for a few months. I also dug up a large clump of Liriope Muscari, divided it into four clumps and planted these in the same bed. The Liriope stays green through the winter, an added bonus to this plant with fall purple flowers.
I have a small Japanese Maple that I have been growing since it was a 6 inch twig that I purchased off of Ebay several years ago. This is a tough tree. I brought it from our old house, where it had been moved three times. I dug it up again this past week from its very sunny spot and moved it to a shadier location. The early afternoon sun was crisping the leaves in the summer, so it had to be moved. This also went into the newer west side bed with the Red Buds and Liriope. Two Blue Prince Hollys were also moved into this bed. I got these this past spring dirt cheap at the Flea Market ( one of my favorite places to go on Sunday mornings).
Other things in this bed include 2 Boxwood and various types of ferns, one being the Japanese Painted Fern.

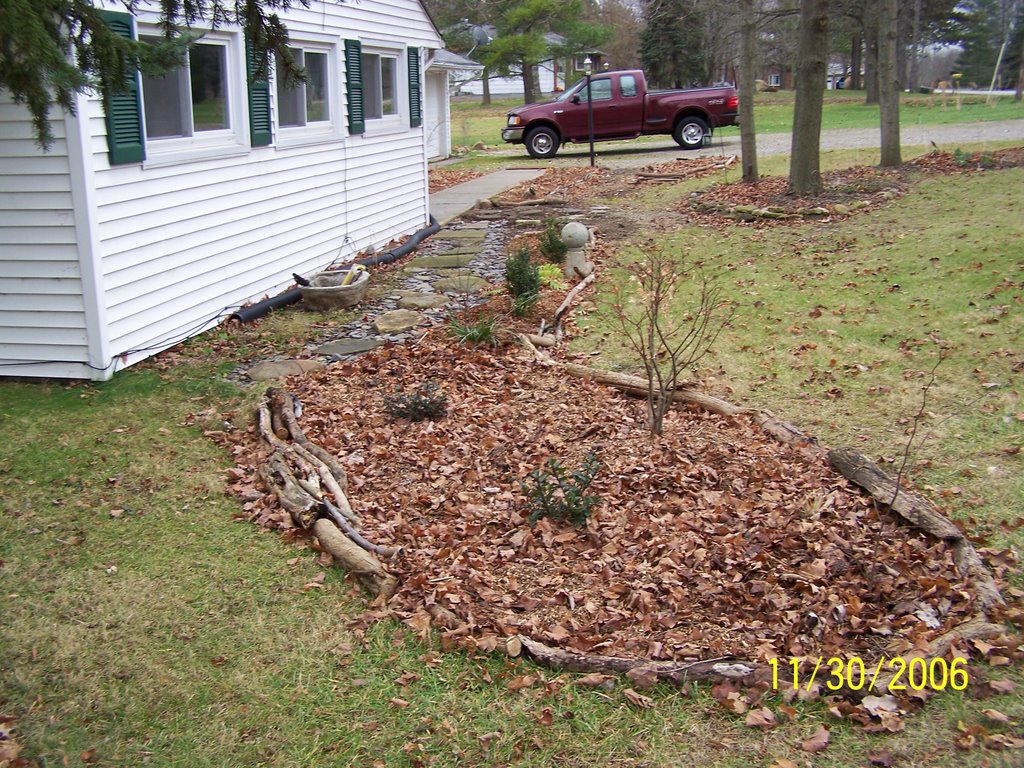 Here you can see this new long bed looking at it from both ends. I put the path in first, early in the summer. The black tube runs from our drainspout and needs to be buried. Another day, another project. The three windows are our bedroom. Once everything gets large enough, it is going to be wonderful to look out and see everything in bloom.
Thursday, November 30, 2006
The last day of Indian Summer
Friday, November 17, 2006
Making garden balls
I really enjoy having art in the garden. It is fun to find a little surprise here and there amongst the flowers and foliage. If you have ever had a gazing ball, you know that they are very fragile and unless anchored well, a small breeze can knock it off the pedestal and break it to pieces.
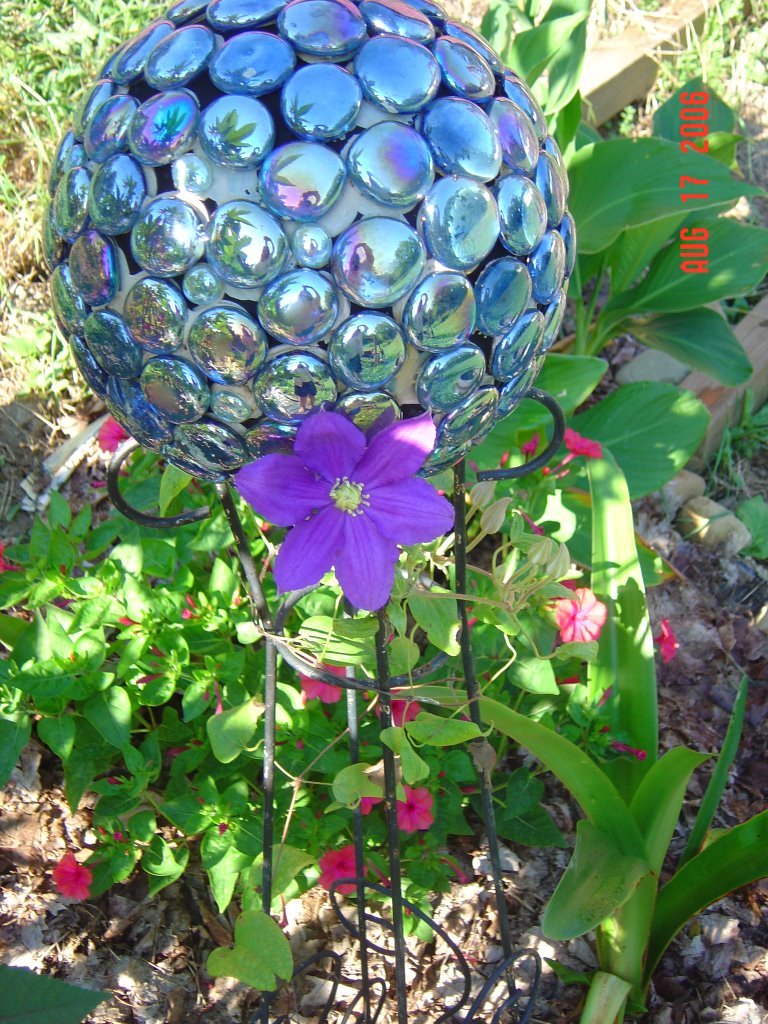
Instead of replacing it with another fragile gazing ball, as lovely and enchanting as they may be, I did a sturdier version from an old bowling ball. You may have heard of this or even seen one. Flat marbles are attached to the bowling ball using adhesive. Sometimes grout is used after the adhesive has dried, and sometimes not. There is a variety of different marble colors and finishes. Some are shiny, some not. Some have a metallic finish and some are even multi-colored. They also come in several different sizes, such as the larger ones used in the first picture.
It does take some time and patience to create one of these. The ball must be cleaned and dried. You must have something to set the ball on while attaching the marbles. An empty coffee can works well to hold it steady while doing this. Then you must wait a day or two while the adhesive dries before turning it over and doing the other half. It is quite fun though, and I get a great feeling of accomplishment once it is completed.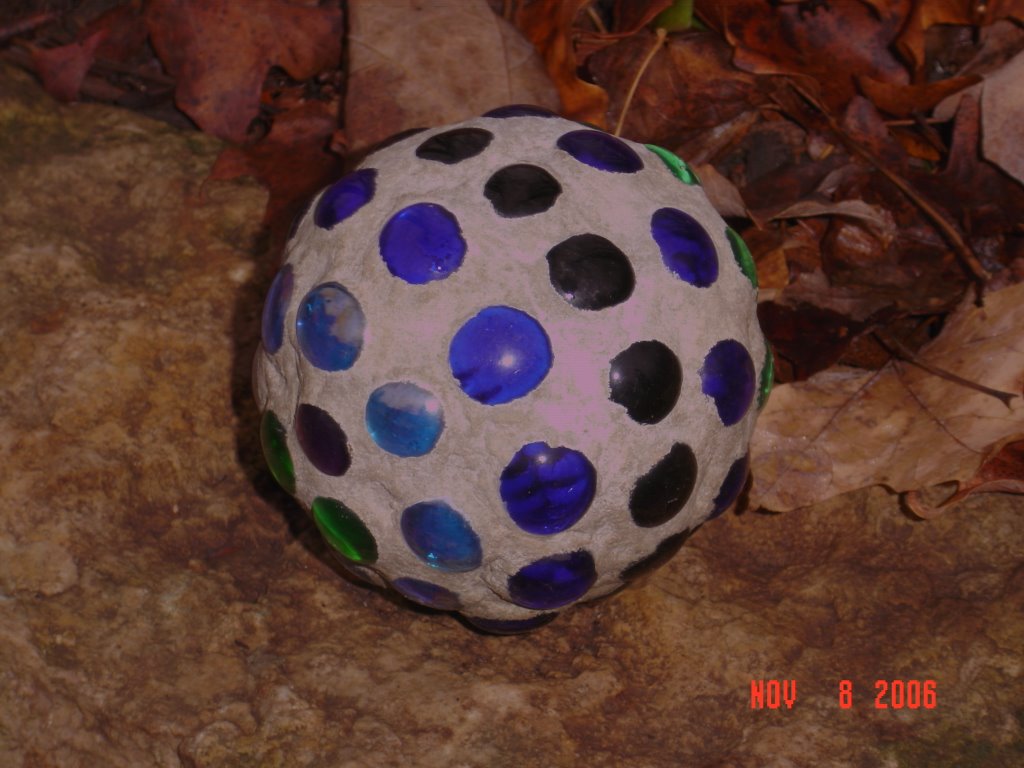
Smaller versions are also fun to make. This one was made using an old baseball. I have also made them using softballs, tennis balls, and even tiny wiffle balls. Smaller ones have their own challenges when putting them together. Instead of placing them on a stand while attaching the marbles, I just hold these and adhere all of the pieces in one sitting. Using exterior grade G.E. Silicone II (for doors and windows), I use a popsicle stick to smear the adhesive on a section of the ball and then stick the marbles to it, not pushing too hard to squish all of the adhesive out. It gets tricky holding the ball towards the end without pushing the marbles out of place. After they are all attached, I sit it aside for a day or so to dry.
There is probably premixed grout available to use, but I use an equal mix of portland cement and sand, with water added until is thicker than pancake batter. With rubber gloves on, I just grab some and rub it in between the marbles, squishing it in nice and tight. I then wrap them in plastic grocery bags for a few hours. By then, the grout has set enough that I can take a damp sponge and wipe the excess off the marbles. Spray it with some water and rewrap. A few hours later I will check them out, just to make sure that I didn't miss getting all the marbles wiped off, I spray it again and rewrap until the next day. I unwrap and spray them down (or just run under the faucet set on low) and wrap once per day for a week. Then unwrap and wet again and leave unwrapped. Spray them several times a day for a 2 or 3 days and they should be cured enough to just spray once a day or every other day for just a couple more days. The grout will end up drying a very pale gray, almost white. You can add concrete dye to the morter mix if you want different colors. I have also just added a box of purple Rit dye to the mix, and although the color wasn't consistent throughout, it did give the white gray some blue-ish areas, which was nice too.
When I used the wiffle balls, they had holes in them, so I was able to string some wire through them and hang them outdoors from a tree. I really enjoy making these. I like being able to make a pattern or use whichever colors I like. I haven't been able to find a local store that carries a wide variety of colors though. Walmart has a decent selection, but they always carry the same stock. I am now experimenting with using beads and glitter on a few instead of the marbles. I hope this will broaden my material selection. I have also seen pictures of balls that had pennies or nickels attached. They were certainly original and I am hoping to cover a bowling ball in pennies this winter.
Wednesday, November 08, 2006
Evolution...
 Here is the new pine bed I put together. It has a Blue Spruce (a true miracle tree) and an Arborvitae. When we first bought the place, this blue spruce was sitting on the ground, still wrapped in burlap. It was on the opposite side of the house, roots growing through the bottom of the burlap. It didn't get much sun, which I am sure helped keep it alive by not allowing it to dry out. I dug it up, removed the burlap and planted it in this sunny spot. It has grown 2 inches in the year it has been in the ground. The arborvitae we transplanted from our old home. I am hoping that someday it will grow wide enough that I can make a tunnel through it.
 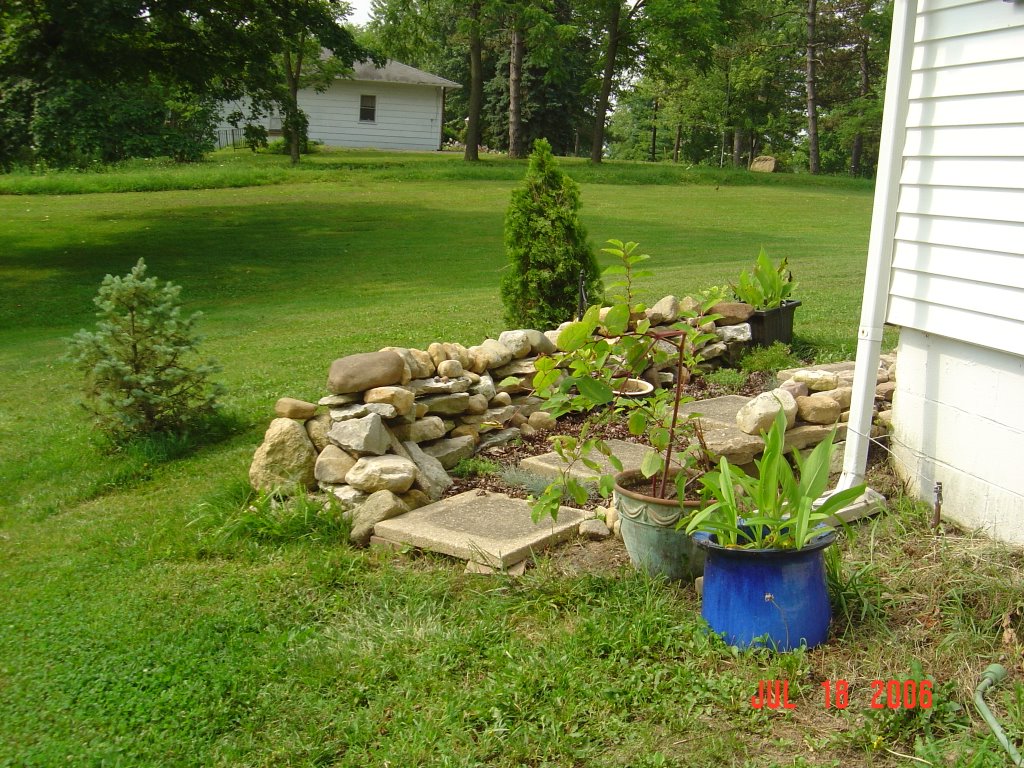 This view shows the path on the north side of the arborvitae. I think the tunnel will be really fun. Walking through tunnels or under arches is always intriguing. This one will be extra nice since it will be green year round.
The south end of the house has gone through quite a transformation in the year since we moved in. Originally, I believe it was a forgotten, or unthought of, space. The garage had a window and a shrub bed all along that end. There was an ugly overgrown trumpet flower shrub where the stone wall now sits. I couldn't wait to dig it out and get rid of it.
The shrub bed was weed filled and few perennials remained, choked out by mint and other obnoxious weeds. Day lilies, tall purple Phlox, and Yellow Loosestrife were the only ones strong enough to survive. 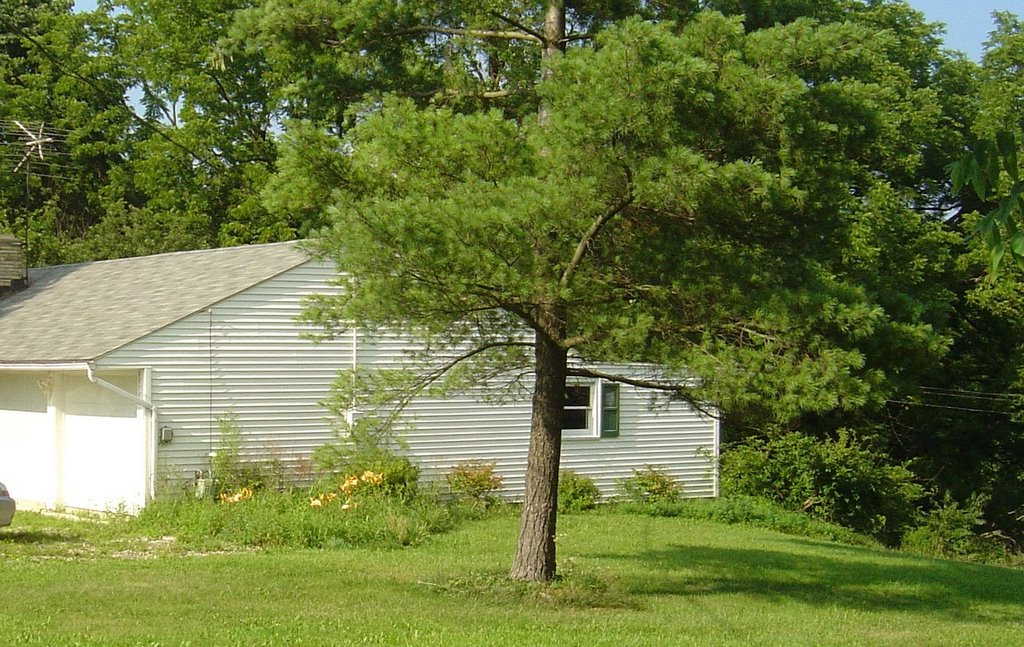 Here is the south end of the house in July of 2005 when we first came and checked the place out. The only few good things were the rocks lining the weed filled bed, the Spirea and Burning Bushes, and the nice pine tree. Before we moved in, the owners did mow down the weeds and dump some mulch over top. It did make it look a lot nicer, but unfortunately, it didn't smother the weeds.
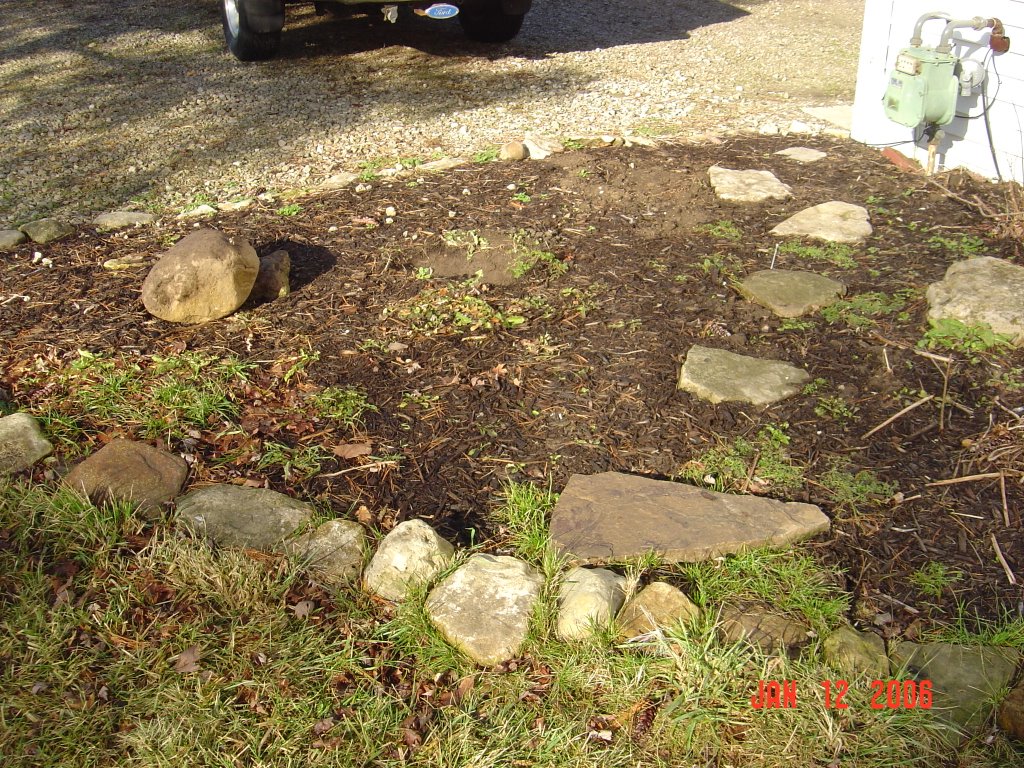 We removed the window and replaced it with a door. I moved the spirea out of the doorway and we made a small landing out of pavers found in the back yard. I then began yanking weeds, digging out that trumpet flower shrub (right corner of the above picture) and began rearranging the rocks. Then came the brick path at the left corner, right through the middle of the bed. The paver steps and short rock wall came next. Behind the house, a path leading from nowhere and leading to nowhere was made of the pavers. The path began at the back of the house, from which there was no door, no patio, no anything. It led across the yard and to the steep hillside, where treacherous, crumbling steps remained. I dug up all the pavers and we filled in the holes with dirt and grass seed. Those pavers have come in very handy for many projects!
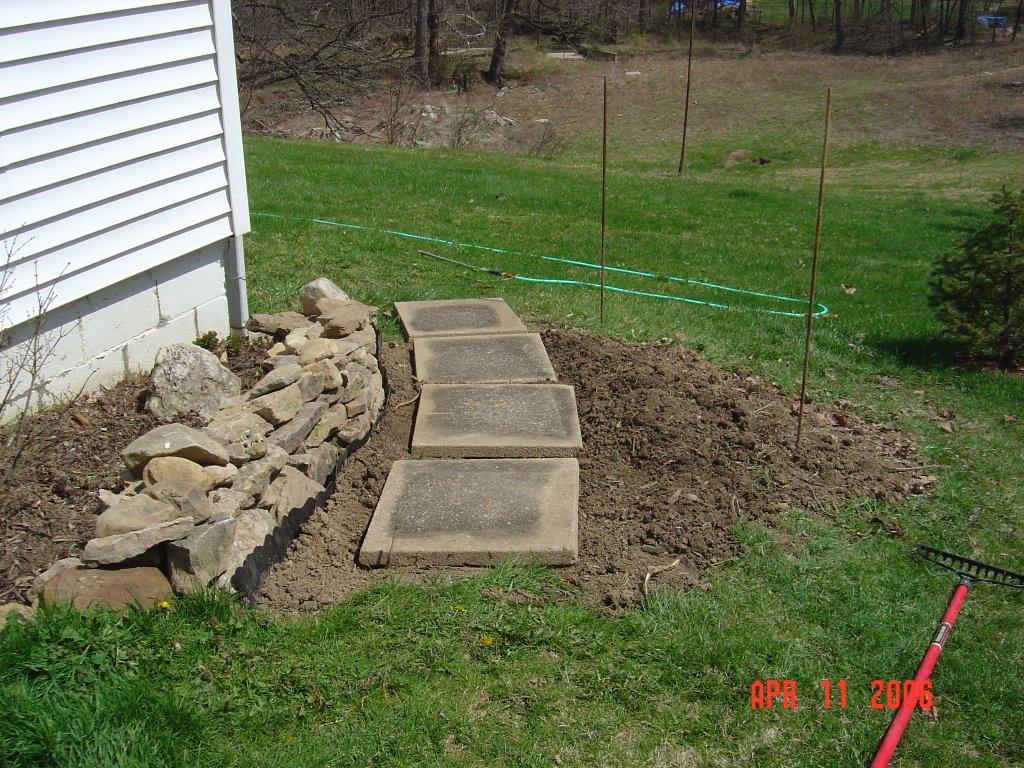 I carefully laid the pavers, making sure they were level and secure. The stone wall was the next phase of the project and then smaller stones and plants. It is filled with Creeping Phlox, Blue Fescue, Grape Muscari, and Chiondoxa.
The paths lead you around the side of the house and to the back yard, where wonderful views of the trees and the valley below greet you. It is one of my favorite parts of the yard now. It still has work to be done. The Yellow Loosestrife and the mint grow rampant. I am determined to get every last piece of them out and replace them with nicer plants. I hope to someday connect the brick path with the paver steps. This area is very much used and a path is being worn in the grass.
Quite interestingly, I found a baby Blue Spruce growing between two of the paver steps this summer. I carefully dug it up, planted it in a large pot and sunk the pot into the ground. Once it is large enough, I will pull the pot from the ground and plant the tree in the ground somewhere.
Little surprises like that are one of the things that keep me gardening. You just never know what will grow and thrive in your garden. It may be an unwanted weed, or it may be that tiny pine growing out of nothing. It always amazes me how such a large plant can grow from such a tiny seed. It is like magic.
Monday, November 06, 2006
The Joys of Lasagna Gardening...
Lasagna, doesn't it just sound wonderful and delicious? Layers upon layers of good things, each one different and great all by itself, but put them together and it is FANTASTIC!!!
Lasagna gardening is not unlike the italian meal. It is layers of earth friendly material stacked in layers, left to bake over the winter to be something wonderful in the spring. The ingredients vary by gardener (the cook) and usually starts with a nice grassy expanse (but needn't), covered in a nice thick wet layer of newspapers. The newspapers are a great way to recycle. They also smother the grass, making a nice weed barrier and help promote those nice red worms to the surface to do their magic.
On top of the newspapers, you put layers of compost, leaves (shredded or not), chipped wood, and any other organic materials you may have. Straw can be used, grass clippings, shredded newspapers can be added, if you have left over bags of top soil, they can be added. Top the entire thing with mulch and just let it sit until spring. Voila, you will have a nice fertile, organic, worm filled garden bed, waiting to be planted.
Follow this link for a good story on lasagna gardening; Lasagna Gardening
So a few days ago I began some lasagna beds in the wooded area in front of the house. I extended one existing bed by 10 feet, added another 8 ft x 4 ft bed and a path and began another triangular shaped bed around some smaller evergreens. I ran out of newspaper and had to go to the recycle center bins and retrieve some! So far I have two thick layers, the lower layer is all leaves and the upper layer is small chipped wood. I will be adding many more layers as the season progresses, but this is a good start.
These new beds are all outlined with sections of fallen trees. It looks rustic, a nice feature for the wooded area and a nice compliment to the stone lined beds. I brought a hollowed log from the ravine and placed it in one of the beds.
My husband Chris just shakes his head anymore at my gardening expansions. He is getting used to them and he always likes them come summer when the plants are flourishing.
You may be thinking it is going to cost a lot of money to fill all these new beds. It won't, thanks to the many seed swaps that I have been a part of. It won't be much longer and it will be time to begin winter sowing, the great way to gardening in the winter. This will provide many, many new plants for me and lots of pretty new flowers. I will also transplant some things from other places on the property, making the new beds look as old and established as the existing ones.
Saturday, November 04, 2006
Planning for spring has begun
Well, now that there is no green gardening to do, I have begun spring planning. Deciding which beds to expand, where to begin new ones, what to move where, what seeds to start for which locations! So much work, for such a long winter.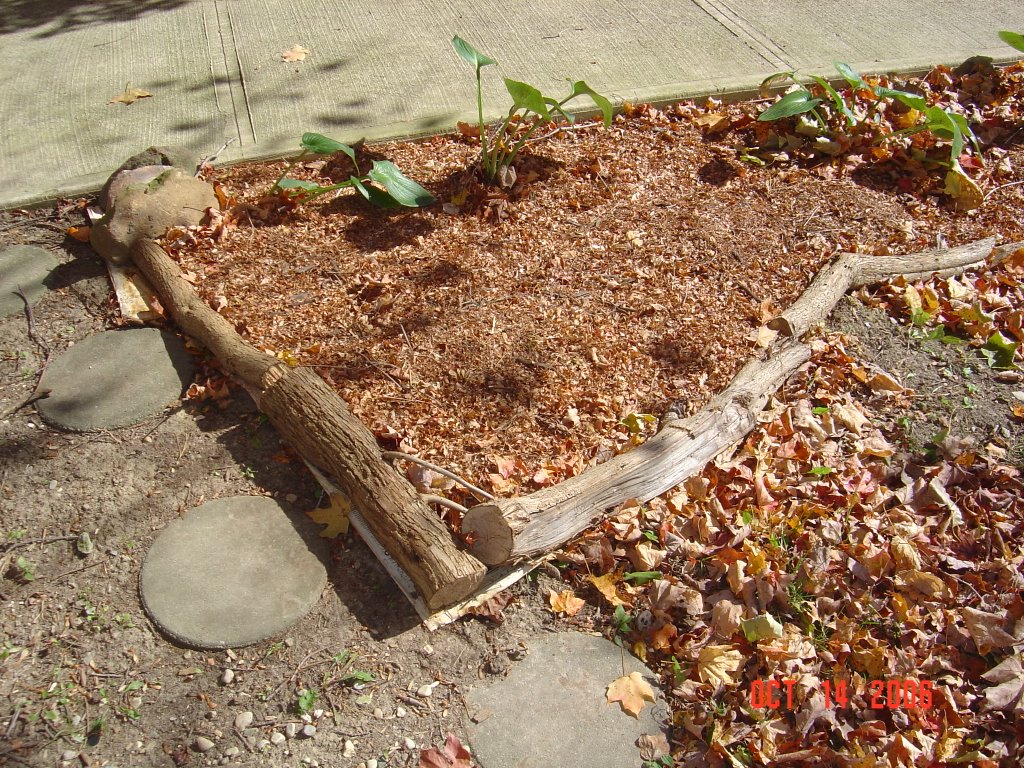
I spent a good amount of time lining two beds with logs and covering the ground around the plants with newspapers. Then raked tons of leaves, shredded them and put them thickly over the newspapers. The newspapers keep the weeds from growing and is organic. It will eventually break down and become part of the soil.
I also raked lots of fallen pine needles and then placed them over newspapers in another bed, along the south side of the house. It looks so much neater and cleaner with 'mulch' on it now. I hope to cover all of the beds with shredded hardwood in the spring.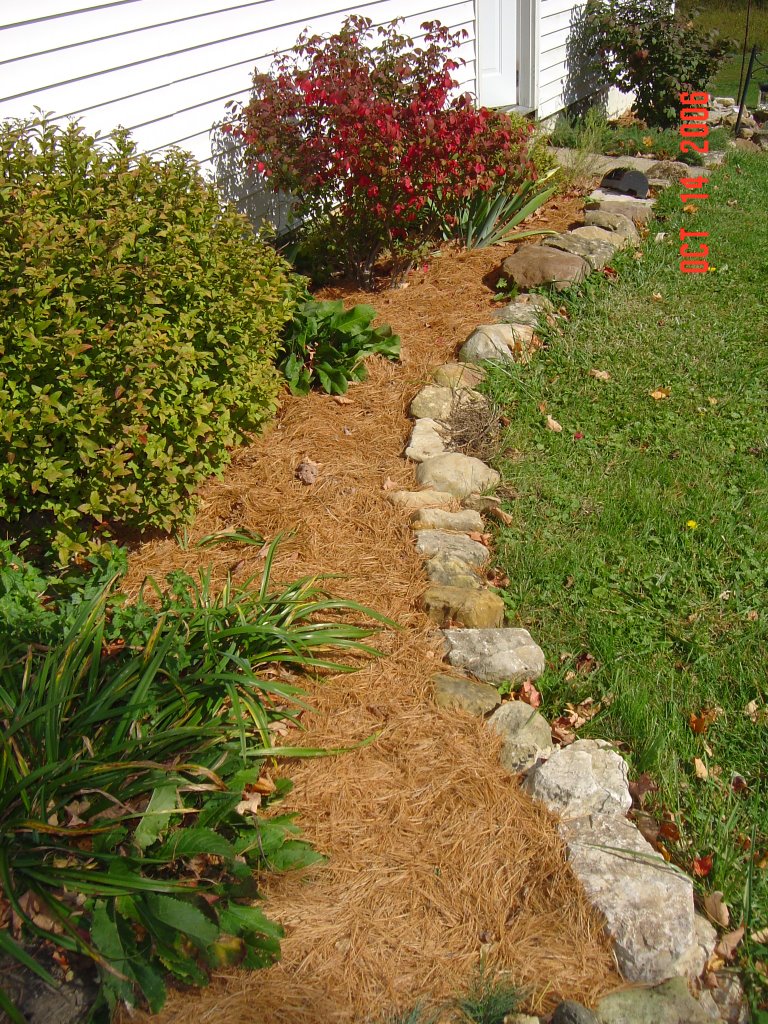 The county sent a letter recently letting us know that they were going to be trimming trees along the roads and asked if we wanted any of the shredded wood or logs. I said YES!! We get the shredded wood by the dump truck load and I requested 1-3 loads, plus the logs for the fireplace. I am very excited about this. I will be able to mulch all the beds, create paths, cover the existing paths, and hopefully still have enough to cover some of my outdoor work areas. This unexpected gift should be arriving in the next few weeks. By spring, it should be composted enough to spread right on the beds.
There is a lot of work to be done outdoors over the winter. This is the perfect time for rock and brick hunting/collecting. The previous owner dumped truck loads of rock and brick all over the property. It made some spots ugly, but it is nice for me to just go pick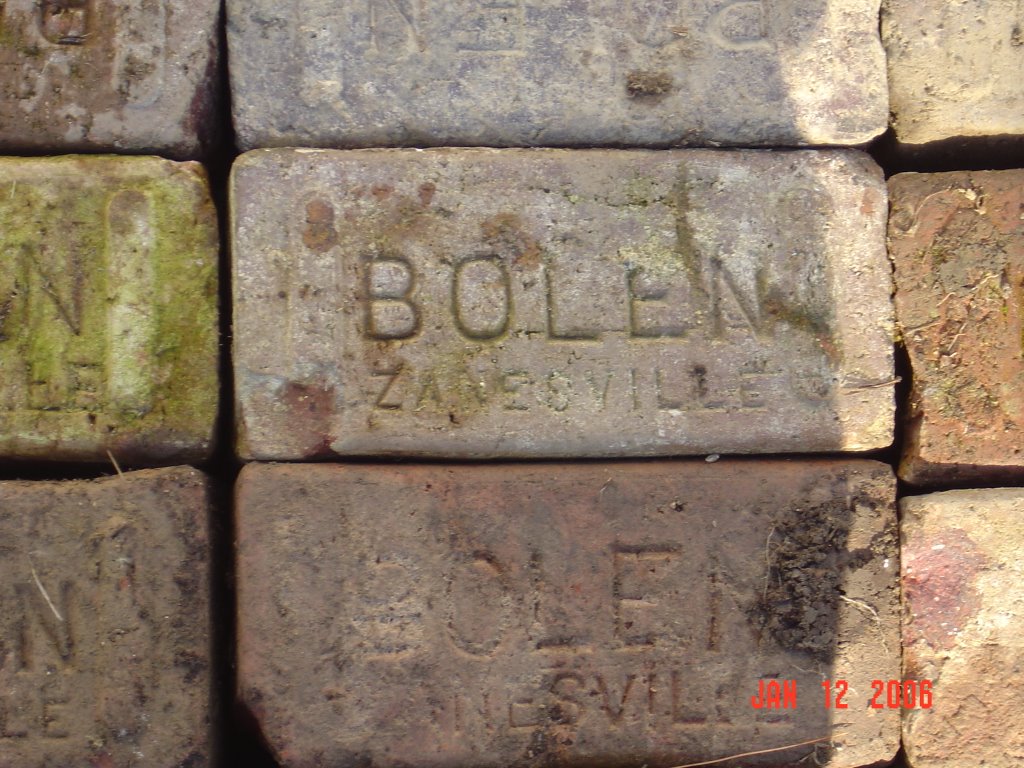 up what I need right here, instead of driving the back roads looking for farmer dump spots. The rocks are nice to line beds with, to stack as walls, or use as a focal point. The bricks also make nice edgers and make fine paths as well.
The rocks I have found are normal field stone, hunks of limestone, beautiful green, red, and white granite. As a lover of rocks, this is wonderful! I have rocks on every side of the house and even have a bunch inside also. There is nothing like a good rock to bring the outdoors in and to make me feel closer to the earth.
This is a short stone wall that I made late last winter, early spring. All the stone was found scattered about the property. I gathered and loaded the truck, loaded a wheel barrow, loaded a wagon, or just carried to this spot and carefully stacked it nice and tight. It turned out very nice and should last for many, many years. I hope someday that the arborvitae planted next to it will grow tall and wide enough so the steps will tunnel through it. Wouldn't that be fun and beautiful?